We’ve updated this post and included a NEW Google Sheets template
Track Tasks and Plan Like a PR Pro with Google Sheets [free template]
A career in public relations often means juggling half a dozen accounts and managing a never-ending list of tasks. This all can definitely be daunting; however, there are ways to make your days a little easier and your communications program run more smoothly. This all comes down to effective planning and task management.
Many PR practitioners track tasks with pen and paper, whiteboards, Post-it notes, emails, Outlook notes, etc. But these lists quickly turn into an array of messy crossed-out action items, notes squeezed between margins and many killed trees. My suggestion to everyone: digitize your to-dos.
Download a free planning spreadsheet template
I’m a believer in spreadsheet task management methods. Not only do they reduce clutter, but also help prioritize, easily update and adjust on the fly (cue “copy/paste” functions).
My personal planning spreadsheet even allows estimating the time it will take to complete a task, as well as track billable hours (very important in agency work). At a glance, you can see your availability for the day and plan days into the future. It’s a win-win!
Download my planning spreadsheet and see if it helps you keep track of it all. It can even help those not in PR. Each Monday, I duplicate and update as necessary the previous week’s spreadsheet.
Components of planning spreadsheet
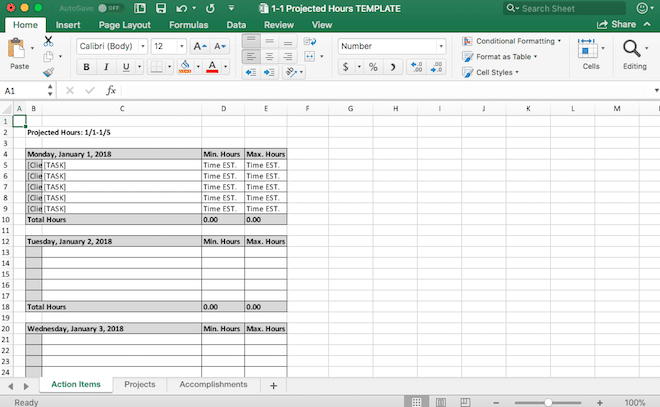
To get the most out of the template, you’ll want to know about some of its aspects and features. As you’ll see, the spreadsheet is broken down into the following tabs:
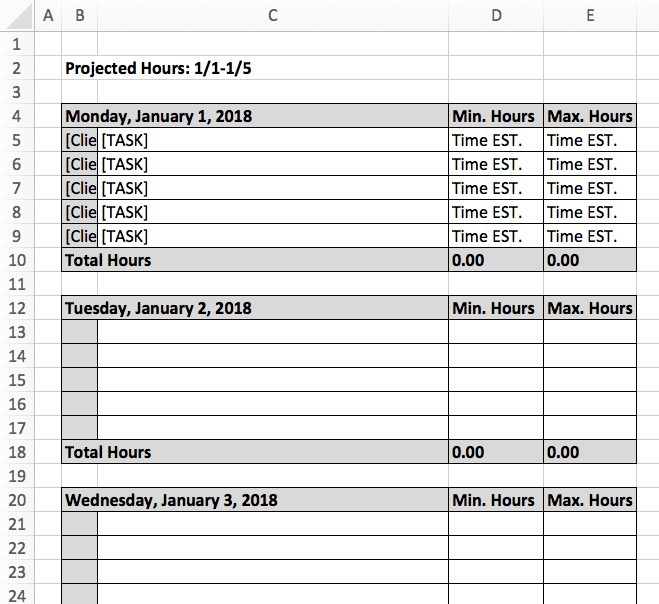
- Action Items: Giving you a “day-view” task list
- Plug in new deliverables and recurring action items
- Accurately plan your day with minimum and maximum time estimates
- SUM function totals hours to show how busy your day and week will be
- Projects: Tracking all deliverables, statuses and deadlines
- Add each project so nothing gets off track
- Input a deadline, which highlights yellow if due tomorrow or red if today
- Know exactly where everything’s at by including a status and/or future steps
- Accomplishments: Keep a record of all or noteworthy completed projects
Excel spreadsheet tips
This planning document is an Excel spreadsheet, which means it requires some know-how to use effectively. Specifically, the template uses the SUM function, groups and conditional formatting. Depending on your Excel skill level, you may not be familiar with these functions baked into the template.
Let’s quickly review these Excel features!
SUM function
To see how the day and week are shaping up, a formula automatically adds up all projected and tracked hours in the “Action Items” tab. Specifically, the template utilizes the SUM function.
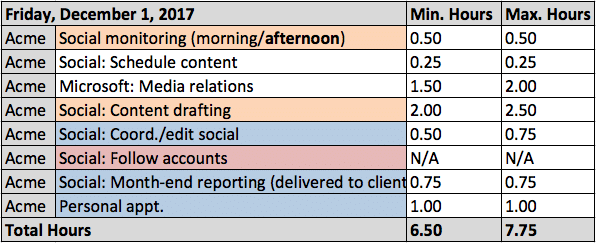
For each day, the formula will look like “=SUM(D5:D20).” This totals the range of cells associated with each of my day’s tasks.
This approach helps track billable, as well as keep workloads manageable. If the day is looking overfull, considering moving a task to tomorrow. Also, I color code the day’s tasks white if unresolved, orange if in-progress, blue if complete or red if canceled.

To look at the full week ahead, I again use the SUM function adding up each day’s projected and tracked hours. (I use the “Min. Hours” of each day as the specific tracked hours, which is what I total here.) This formula looks like “=SUM(D21,D37,D46,D62,D73).”
Groups
The SUM function is a pretty basic, but things get a little more complicated in the template’s “Projects” tab. This second tab makes use of groups and conditional formatting.
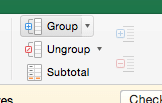
The group (or outline) feature allows you to hide selected columns or rows. This function enables minimizing projects in the template that are a lower priority but you don’t want to lose track of. This ultimately reduces clutter in the spreadsheet.

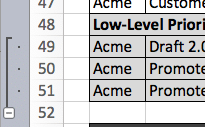
To use this function, simply select the rows you want to hide and click the “Groups” button under the “Data” menu. Then you can collapse projects clicking + or – on the left.
Conditional formatting
Here is where the planning template is trickiest. The “Projects” tab also makes use of conditional formatting. This tab is set up so deadlines occurring tomorrow automatically highlight yellow and today highlight red. It helps ensure fast-approaching due dates aren’t missed.

Fortunately, this function is already baked into the template. But if you want to set up similar conditional formatting, follow this process:
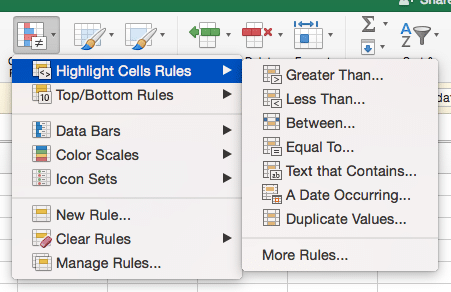
- In Excel’s “Home” menu, click “Conditional Formatting”
- Open “Highlight Cells Rules” menu
- Select “A Date Occurring…”
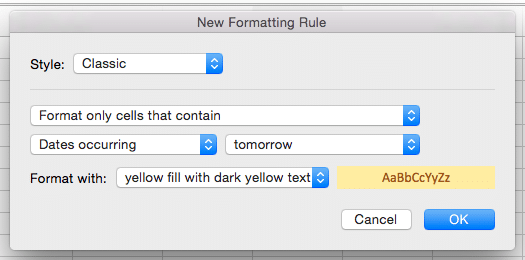
- Choose dates you want formatted (I selected “tomorrow”)
- Select the formatting’s appearance (I went with yellow)
Conditional formatting on this tab also highlights the word “Done” in the status column green. Because who doesn’t like a little positive, greenlight vibe at the end of a long project?
Hopefully, my planning spreadsheet helps make your day a little easier. If it doesn’t fully meet your needs, don’t be afraid to personalize it by adding/deleting sections, creating new tabs, removing columns, etc.
If you’re on the hunt for another planning method you can try services like Airtable, Todoist, or pen and paper (cringe…). Best of luck tackling all your projects!

